AWS CodePipeline
AWS CodePipeline
After using AWS CodeCommit to push the code from the local machine, we build through AWS CodeBuild and use AWS CodeDeploy to deploy the application to EC2 then we will now use AWS CodePipeline to create the CI/CD process to deploy the application.
-
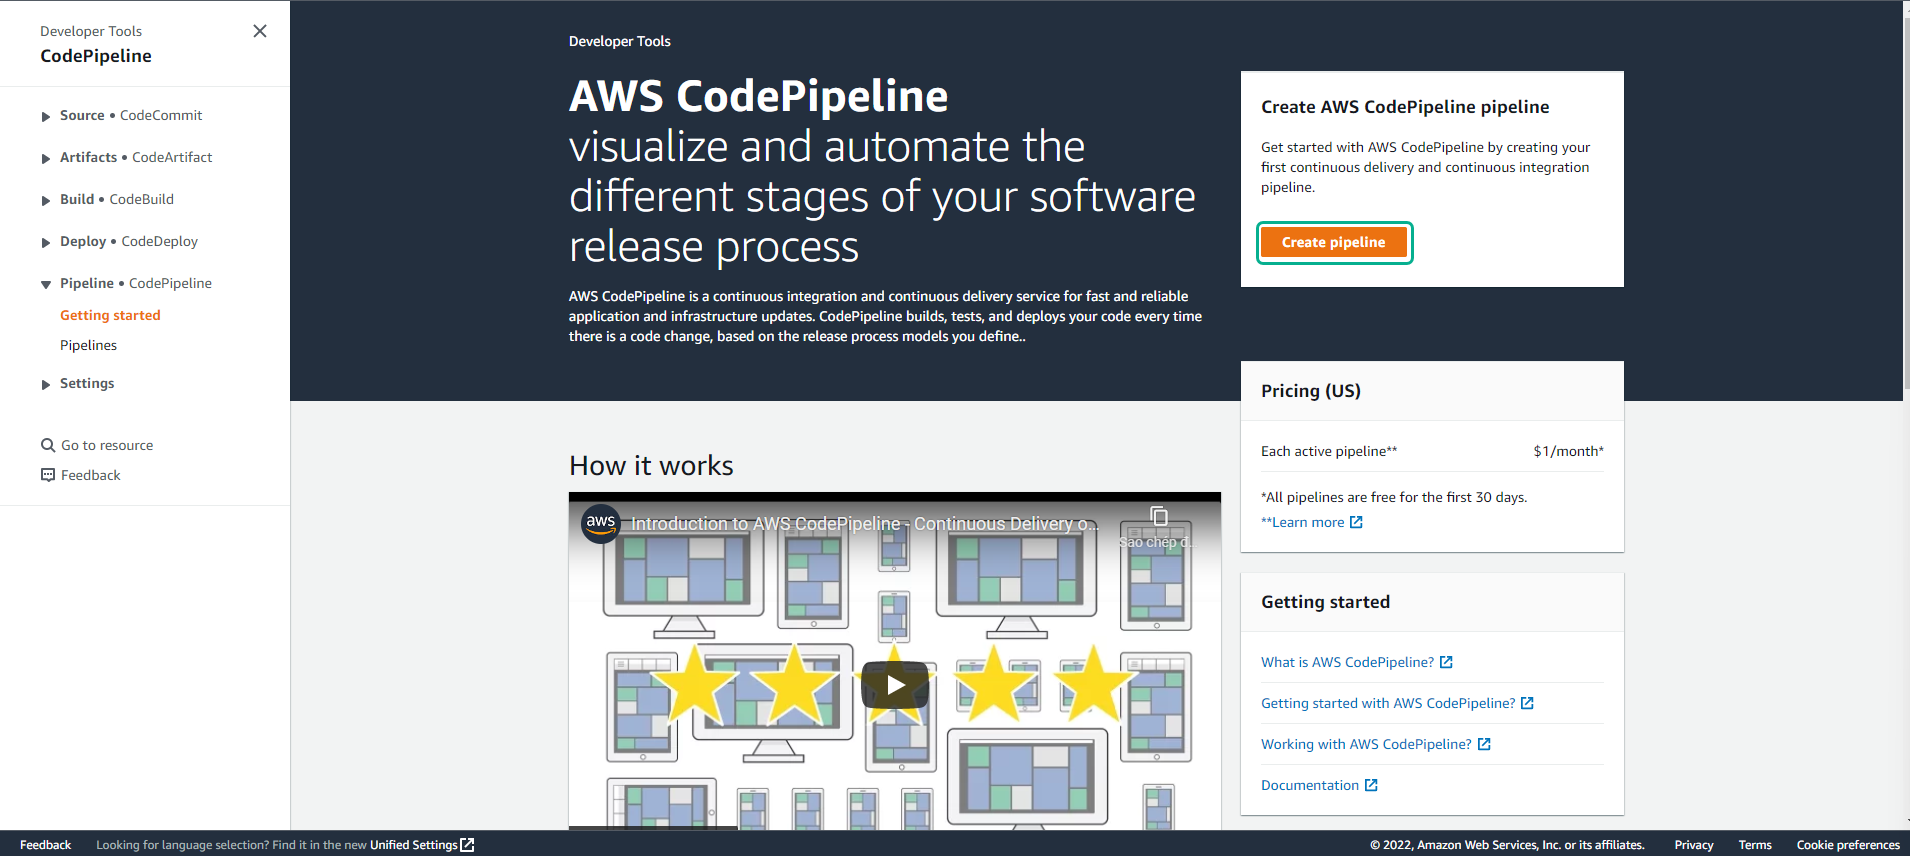
Access to AWS CodePipeline
- Select Create pipeline
-
Configure AWS CodePipeline
- Enter Pipeline name
- Create a service role for AWS CodePipeline
- Select Next

-
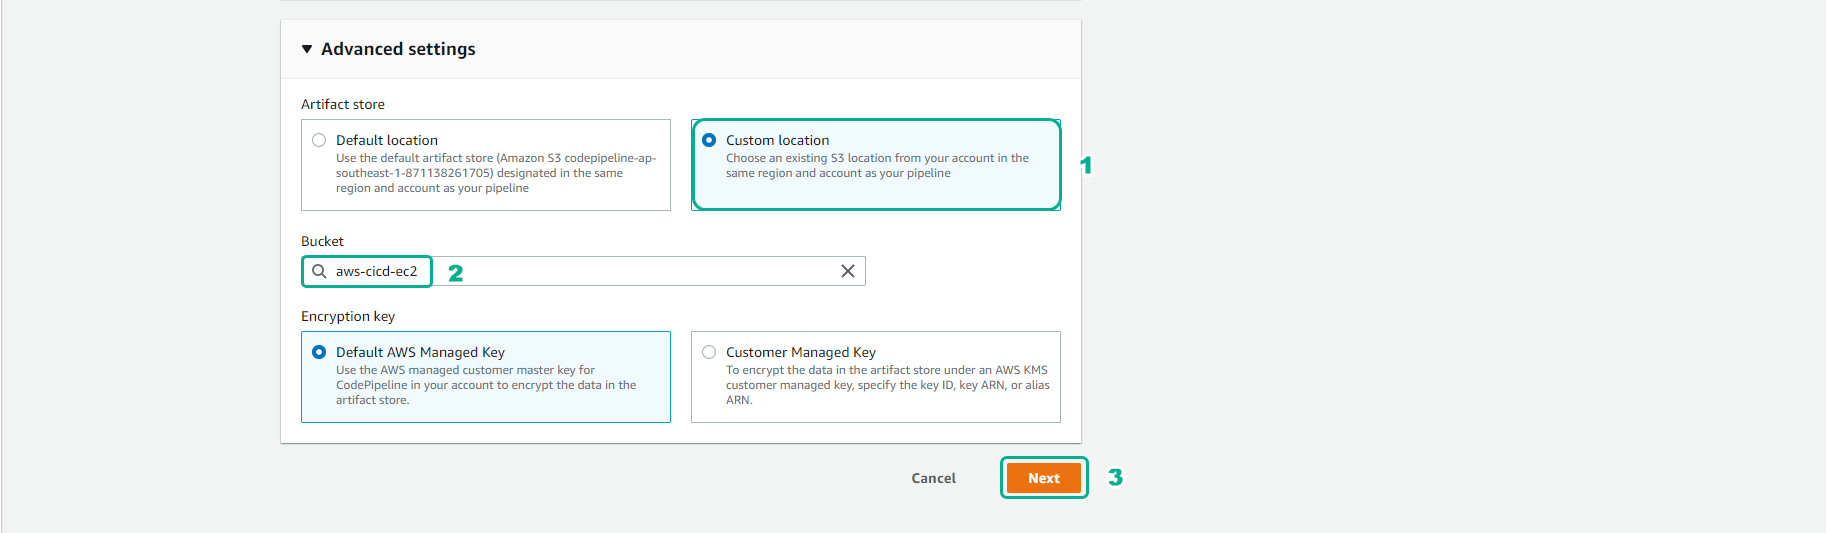
For the Advanced settings section
- Custom location
- Select bucket
- Select Next
-
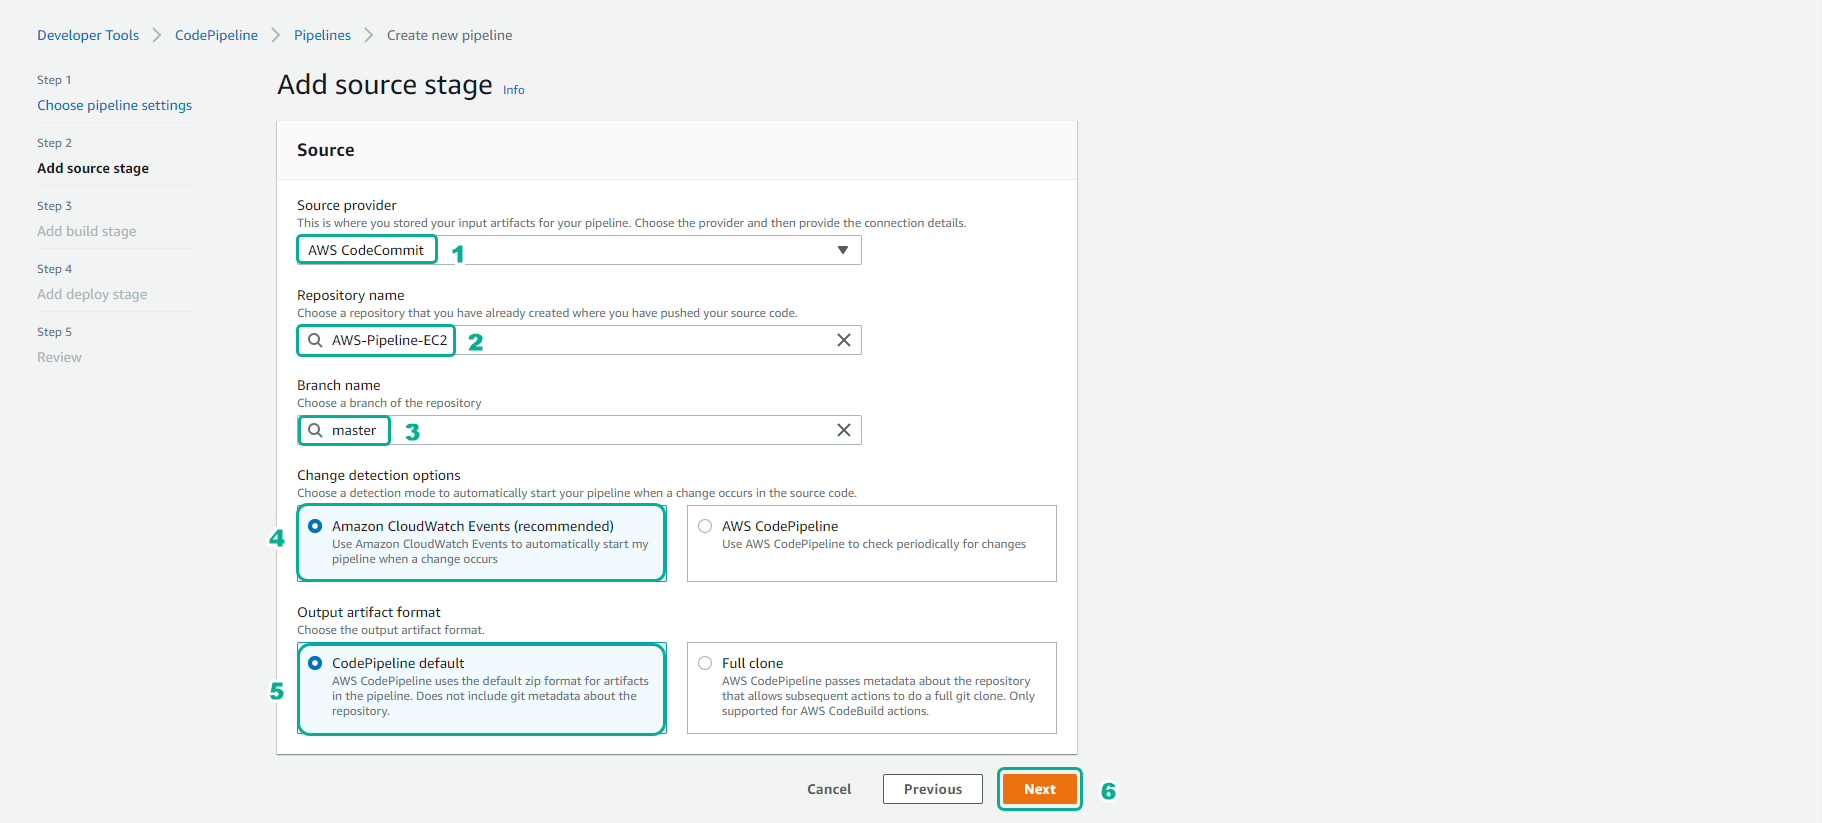
For AWS source stage
- Select AWS CodeCommit for Source provider
- Select Repository
- For Branch name, select master
- Select Next
-
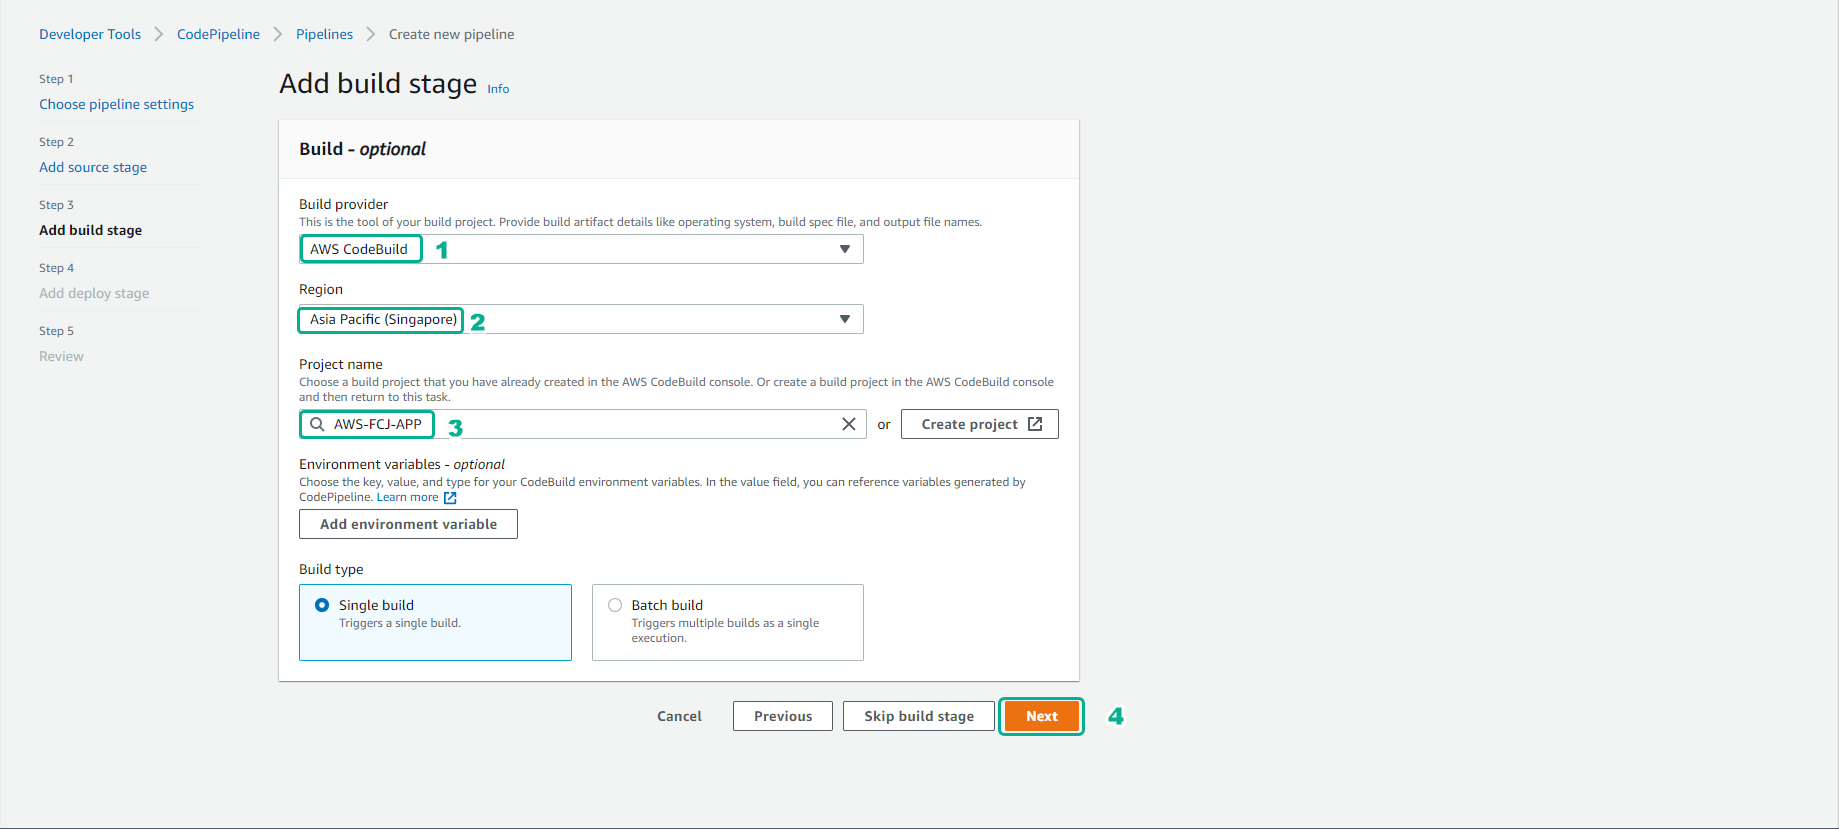
For the build
- Select Build provider as AWS CodeBuild
- Select Region
- Select Project name that you created and build.
- Select Next
-
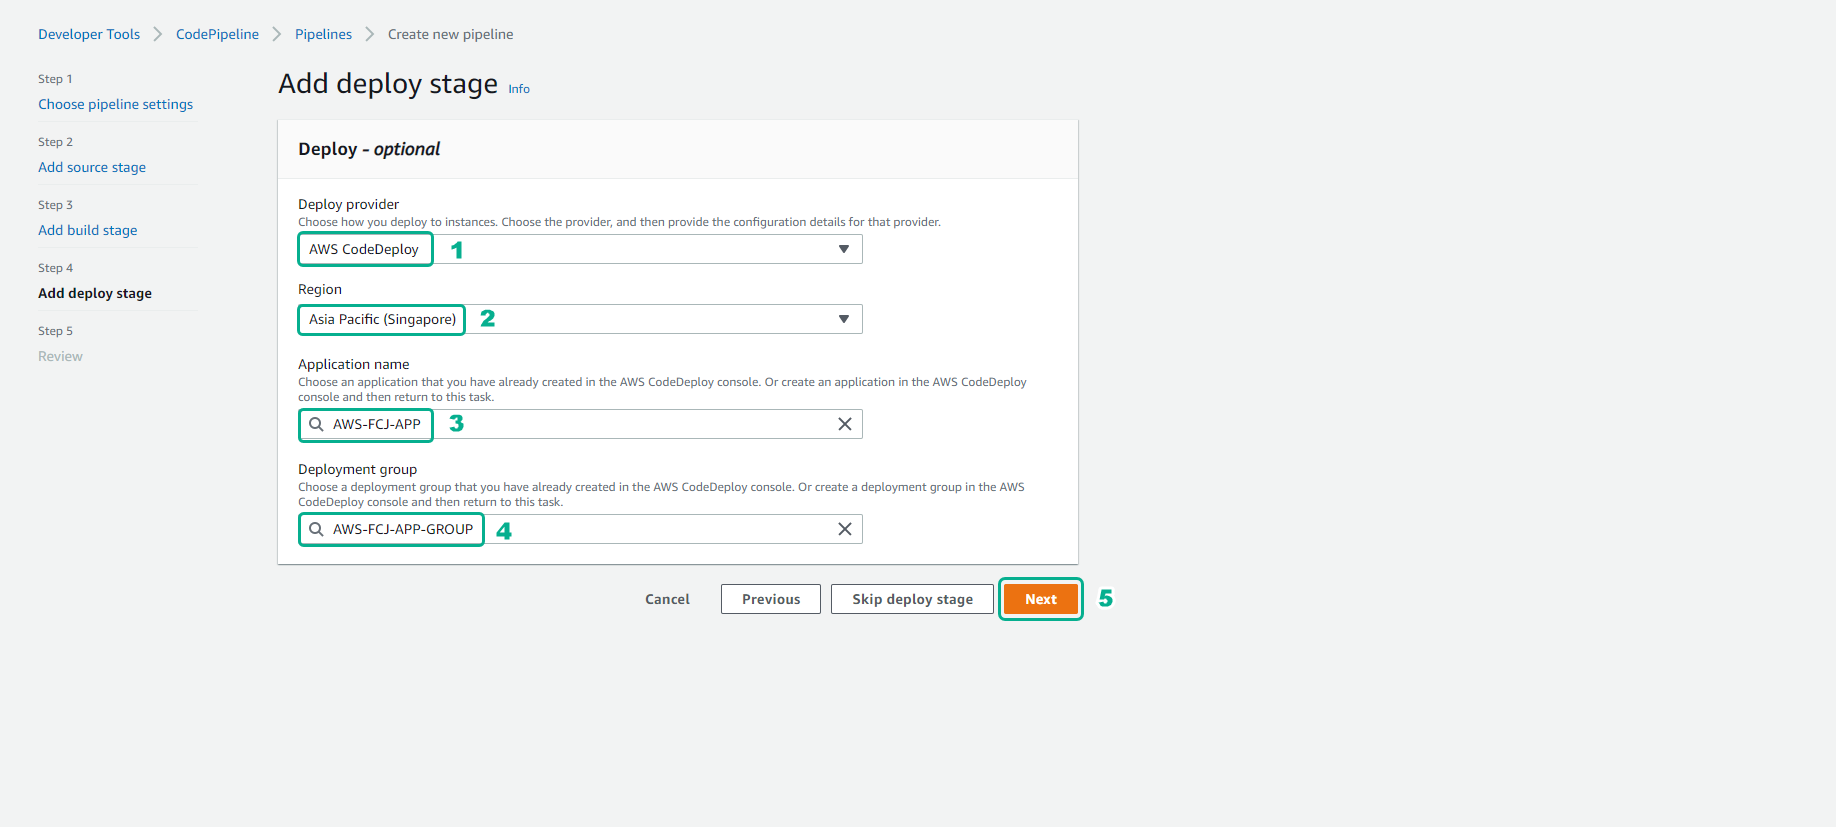
For Deploy stage
- Deploy provider, select AWS CodeDeploy
- Select Region
- Select Application name you created.
- Select Deployment group
- Select Next
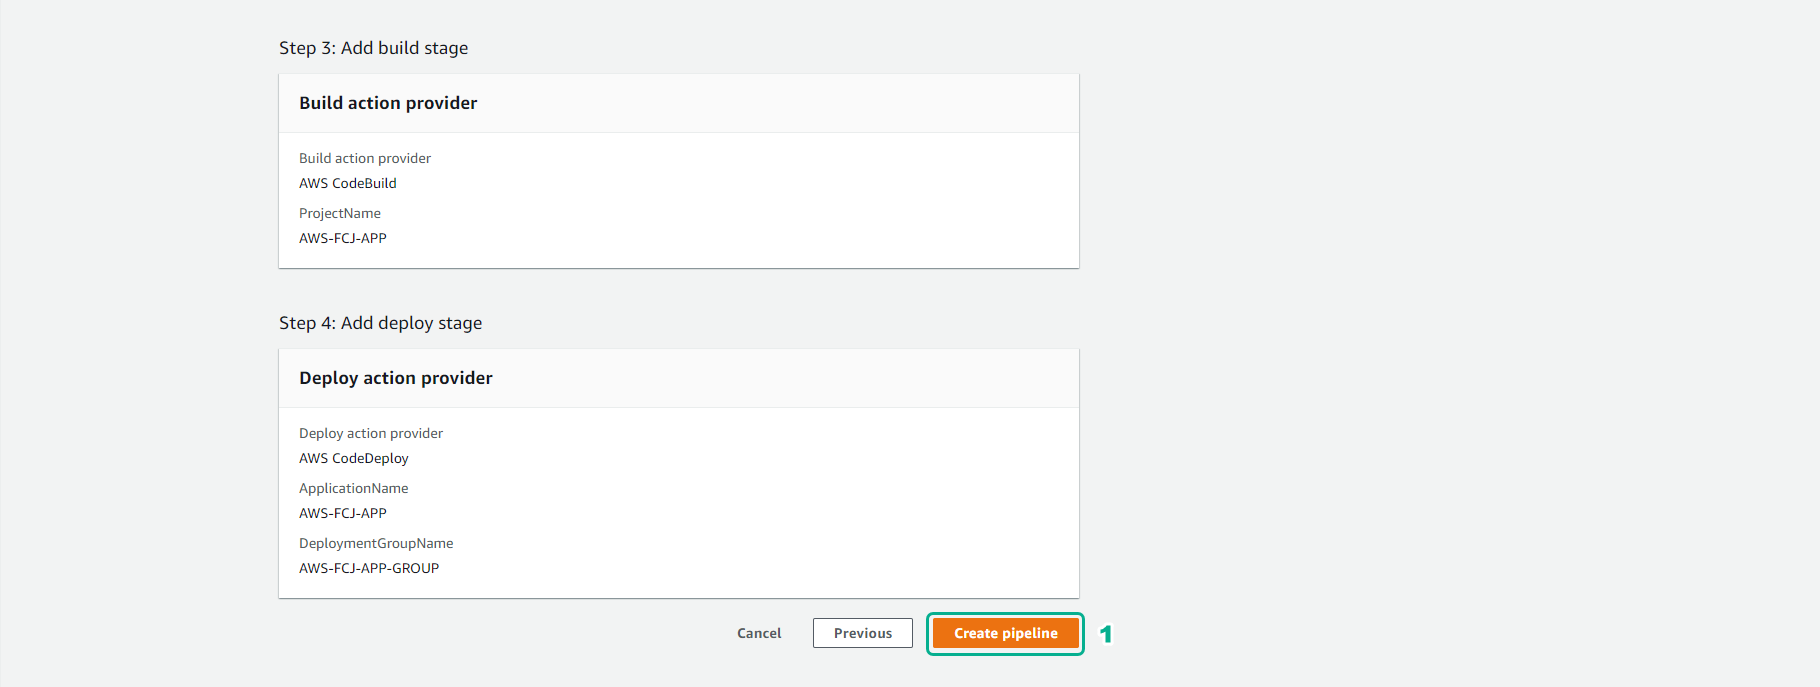
- Select Create pipeline
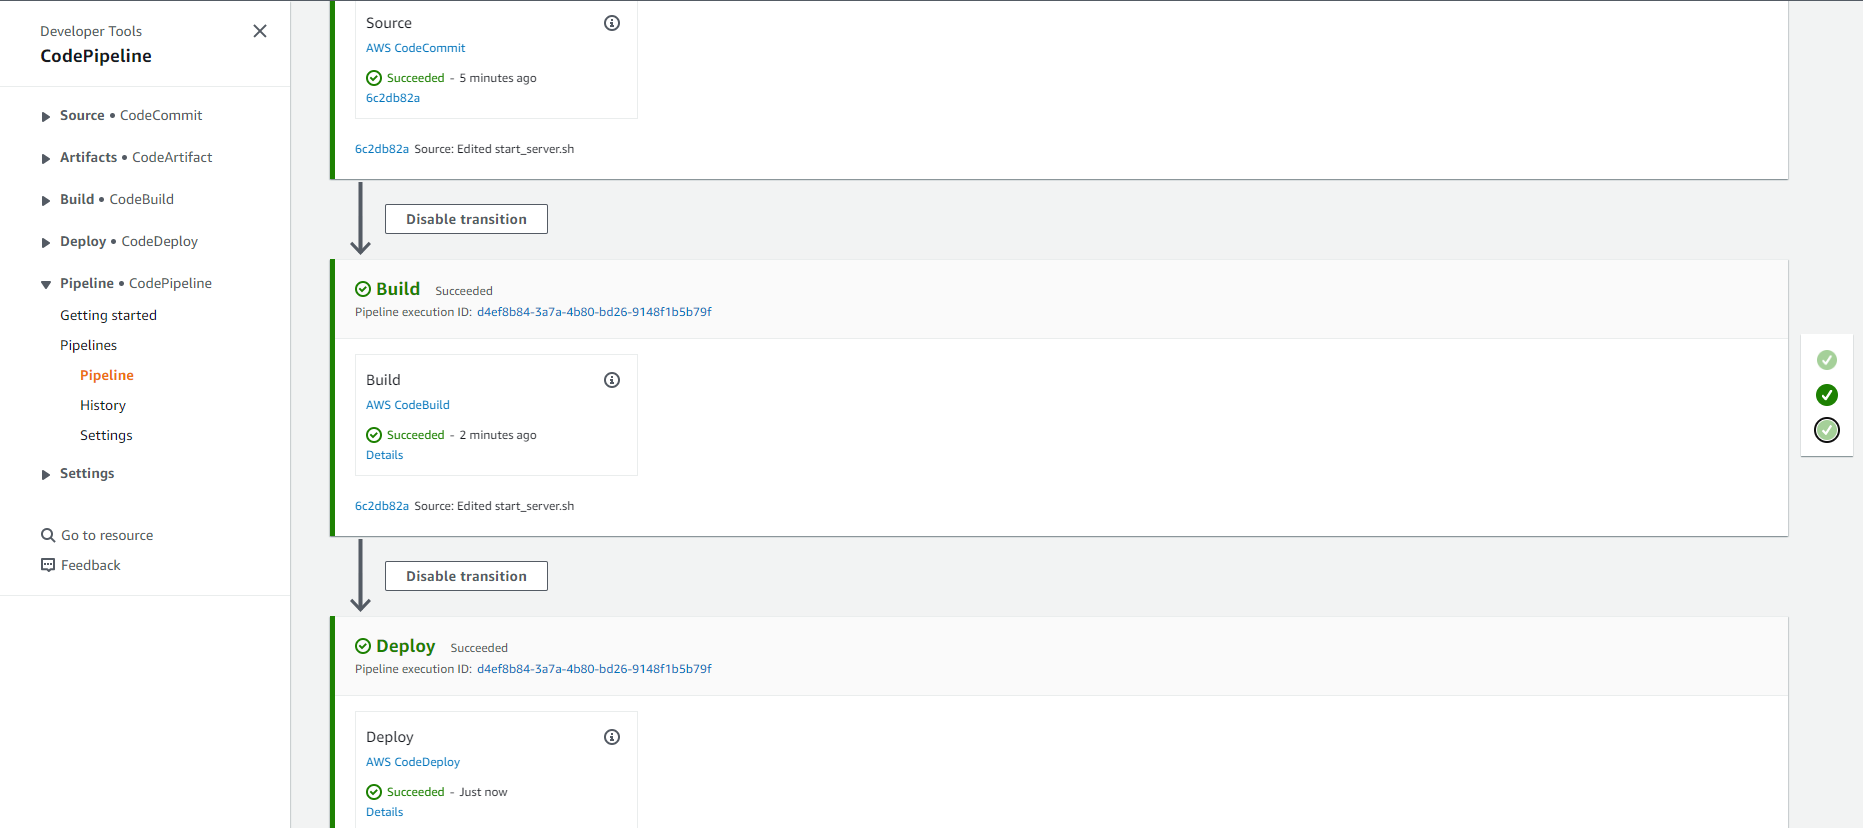
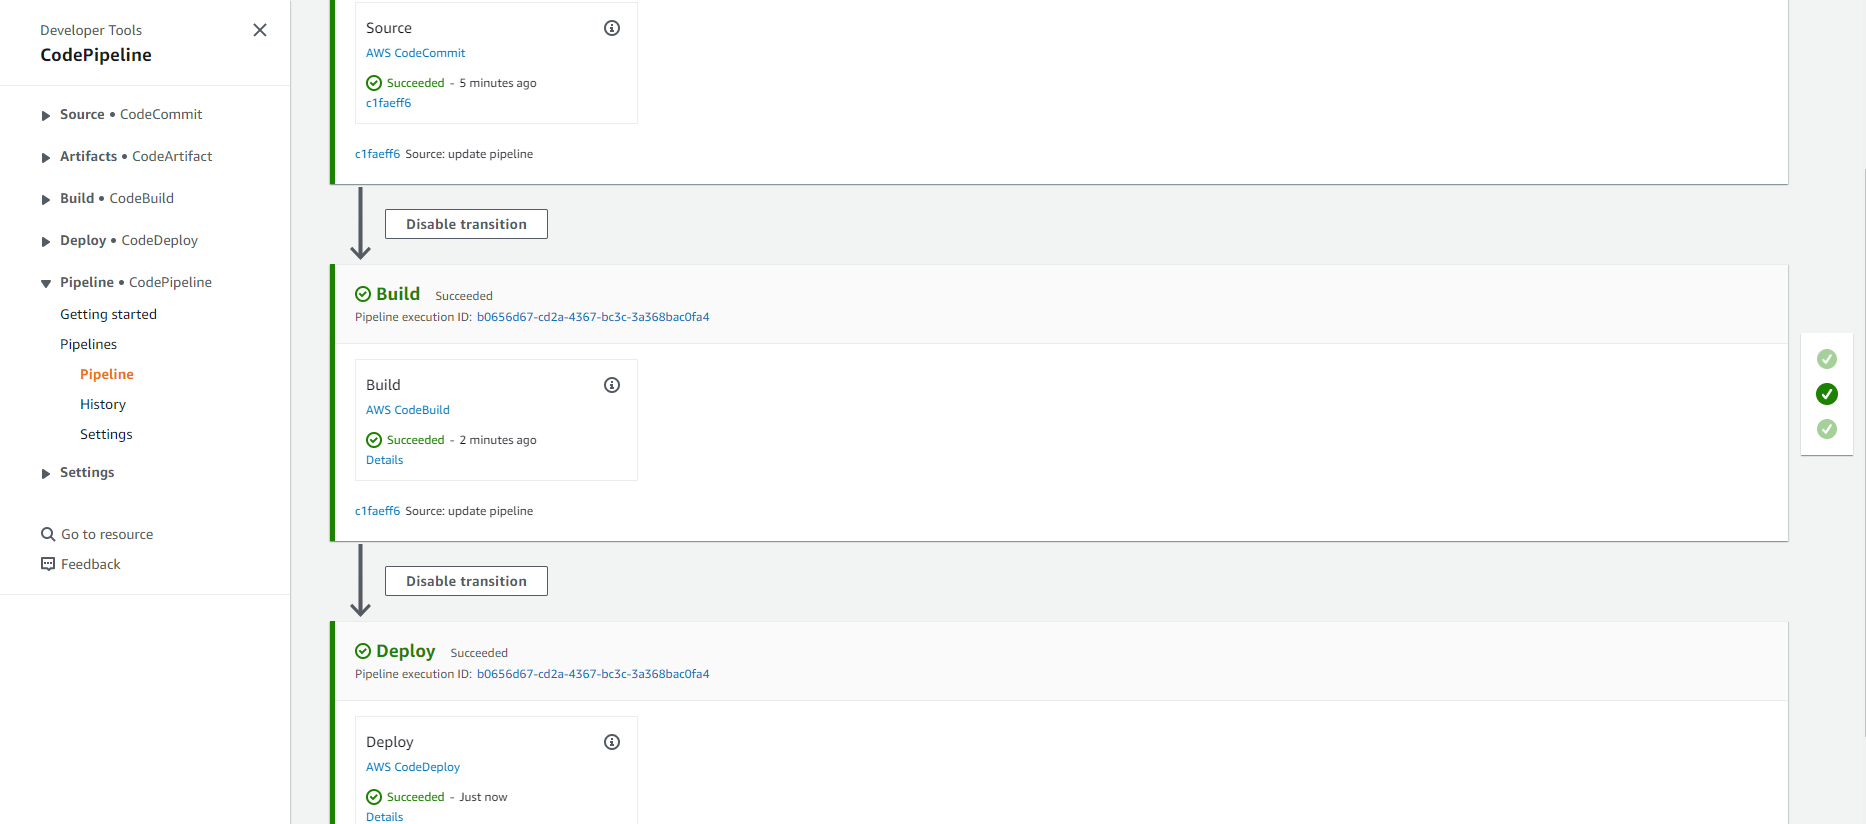
- After successfully creating the pipeline, it will take you about 10 minutes to complete the pipeline.
-
You will try editing the code to test the pipeline.
- You access the application code
- Go to layout, select main file
- Edit the 17th line to Deploy Application to EC2 with AWS CodePipeline
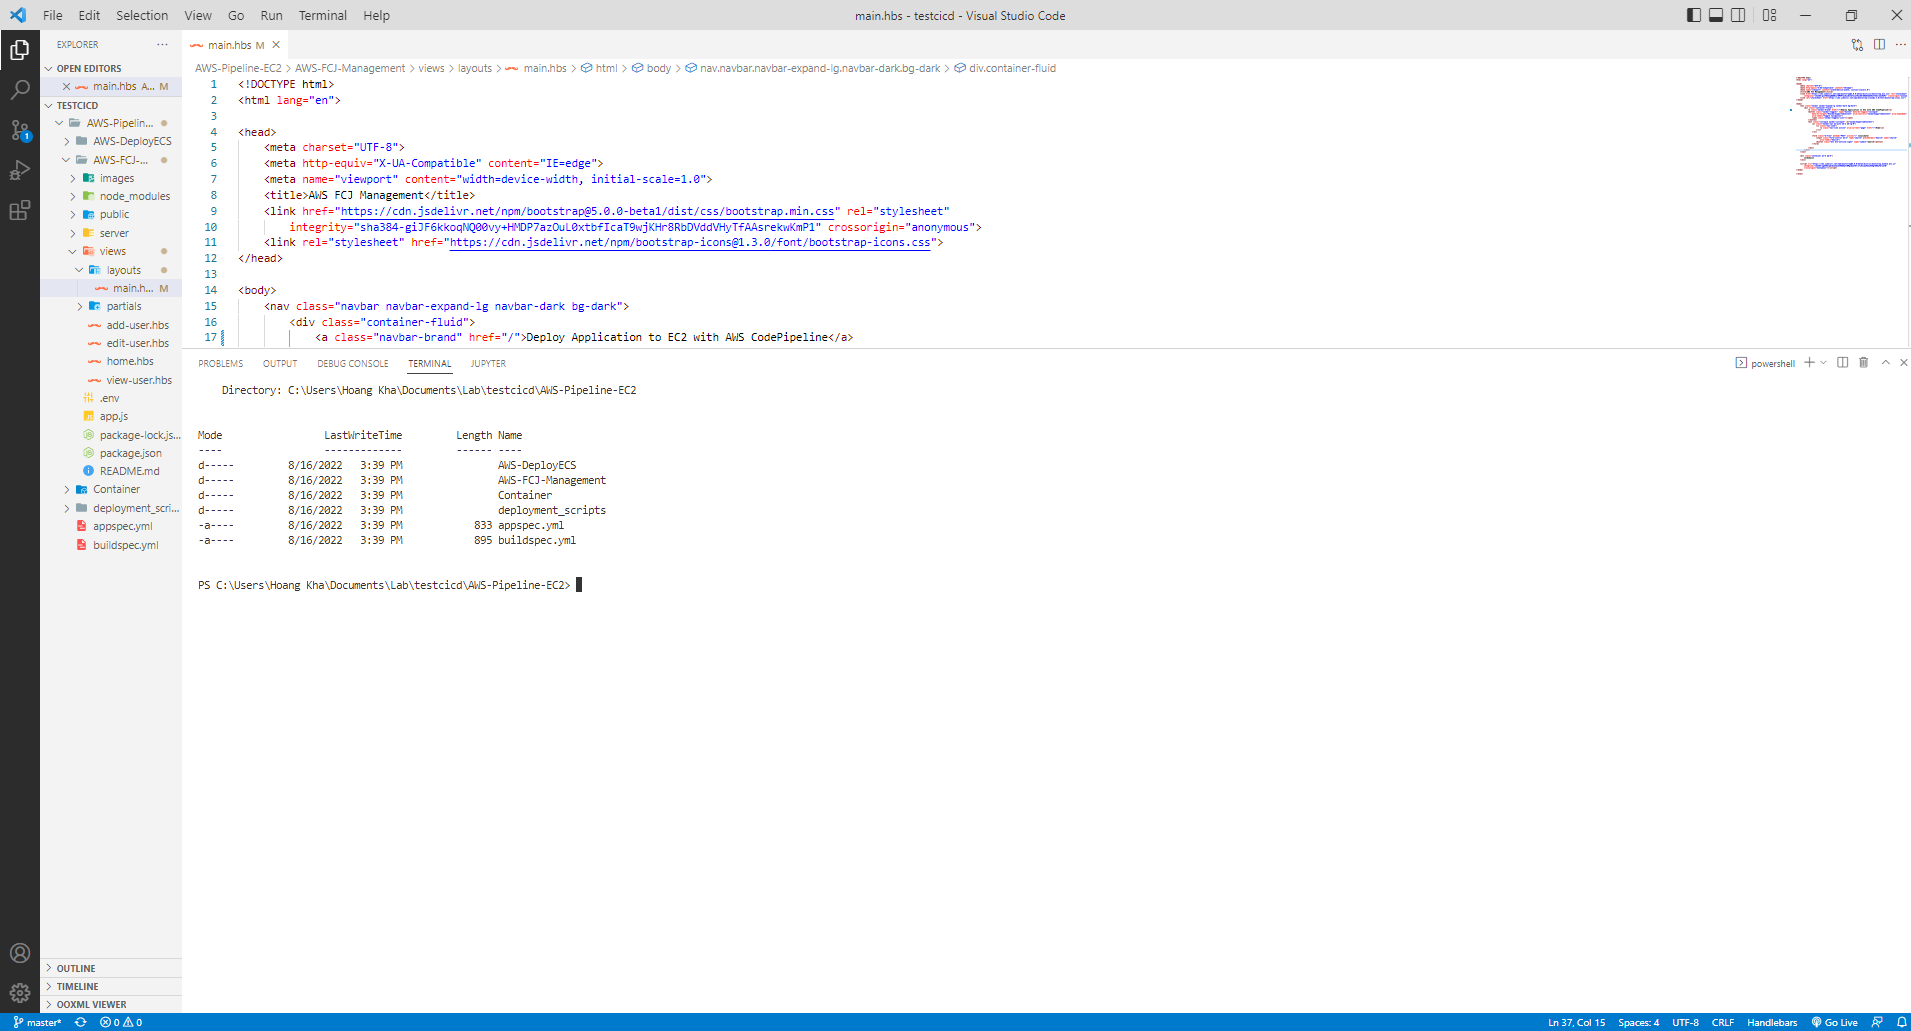
- Then do push the code to AWS CodeCommit

- After the next 10 minutes, we will finish the pipeline we just changed the code.
-
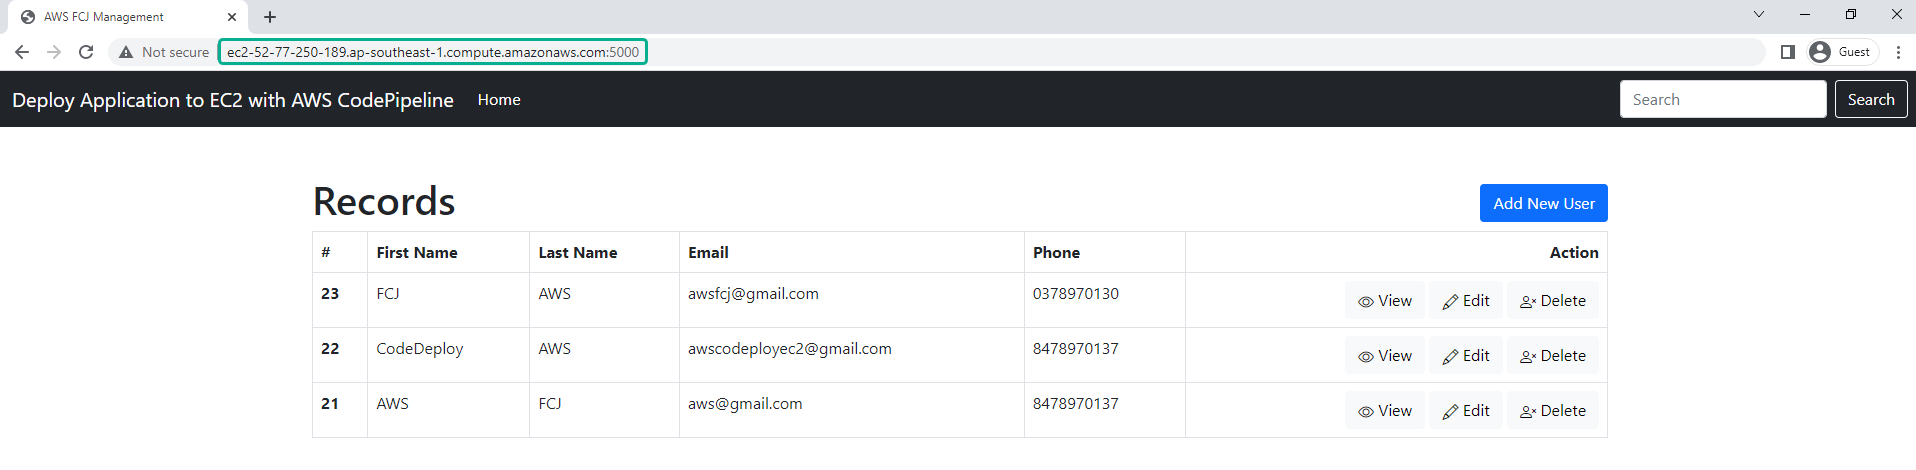
Perform a changed application check
- We access EC2 deployment
- Copy DNS
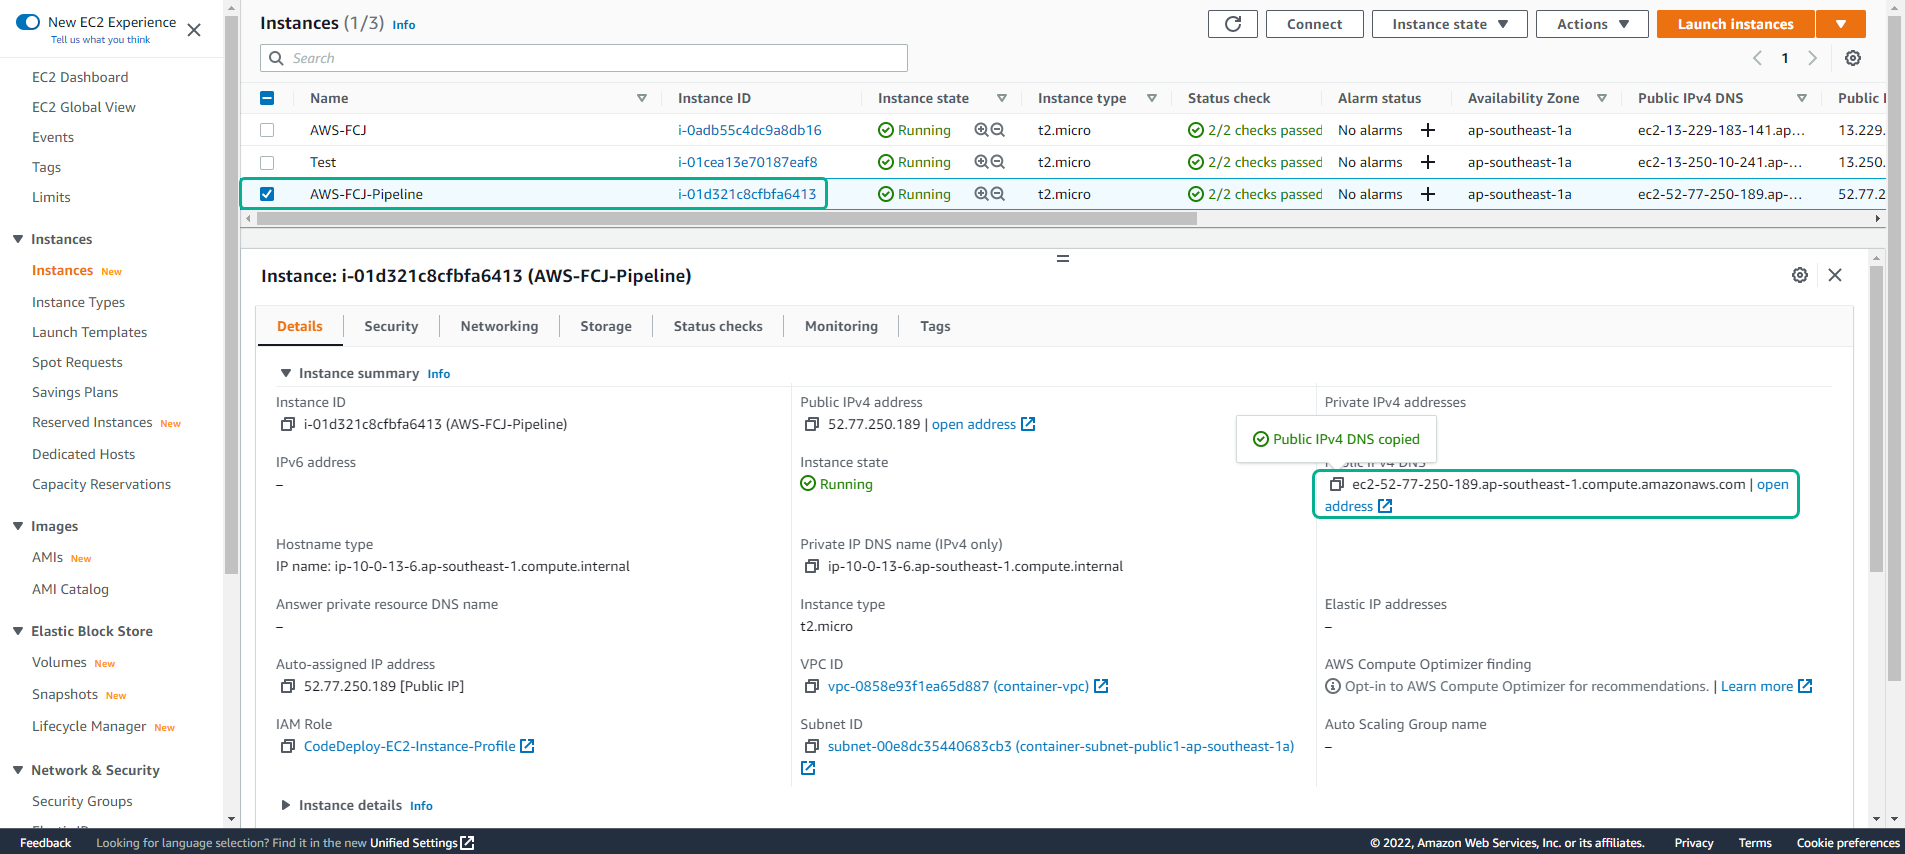
- Then we will access the application via DNS, you will see the line Deploy Application to EC2 with AWS CodePipeline.